Today I am going to share you an extremely wild story about how I automated taking a screenshot of every single Pokémon in game!
The journey starts with a problem of not having every Pokémon in game. I mean.. Who does?
After all.. I am not going to ‘catch ’em all’, now am I? No! I am a programmer, not a Pokémon trainer..
First step was of course to get renders of all Pokémons.. Shouldn’t be too hard, right? Just manipulate, or more precisely.. Man in the middle the connection between my phone and the server, fake that the server sent every Pokémon in game and.. there we go, right?
After quick research I found this implementation in GitHub called Pokemon Go MITM Proxy by a nickname rastapasta, so I tried to setup it in Windows environment.. No luck.. obviously.. Its also documented in the repo that its hard to compile..
After recovering from the disappointment I cloned the repo on my Linux server and ran it there, installation went smoothly and I was ready to go!
Unfortunately there’s still need for root or removal of certificate pinning, but gladly from my last post I had a patch ready to go! So no worries! I installed the certificate as documented from the server and ran an example script that would replace all my pokémons, and I was good to go!
When I ran Pokémon Go after this, I ended up getting a list like this, however it wasn’t enough.. The example would only replace the Pokémons I had with others, but what I really needed is it to clear my Pokémons and add all Pokémons in increasing ids..
So its time to edit the script.. So I opened example.replacePokemons.coffee but coffeescript wasn’t too familiar with me.. Nor was the structure of packets, so first of all I had to lookup coffeescripts syntax before anything. It wasn’t too bad knowing Javascript, but required some effort to get through, but I found also this js2coffee compiler online I could use when stuck.
So the smallest modification I could get through with is remove all the code touching the pokemons, and craft a piece of code that replaces whole inventory with inventory cotaining an item with PlayerStats and all available Pokémons.
As funny as it sounds, PlayerStast too are passed as an InventoryItem.. Smart..
The minimal implementation I was left with is as follows:
I am not even sure if all of this is required.. But its pretty straightforward.. Replace inventory_items with array containing just PlayerStats, then add 151 Pokemons with ids 1-151 and be fone with it!
The end result is.. well the same as the previous as I was too lazy to run the initial version of replacePokemons to get the real initial result sooo.. Now we’re left with just taking a screenshot of every Pokémon.. Should be easy.. right!
For our good you can scroll the list of Pokémons by swiping so capturing screenshot should be easy as taking screenshot with Pokémon id as name, then swipe predefined amount, sleep 10 seconds to let the model load, and repeat!
A little Windows shell script I made is as follows:
Take a screenshot with naming it with looper number
Pull the screenshot from the sdcard to the working directory
Evaluate a swipe, from right to left, changing the Pokémon on the screen
Sleep for ten seconds, because this is not implemented in a simple sleep fashion, ping 11 times and get approximately a 10 second delay
After running this for.. let me calculate.. approx 30 minutes.. we’re done, and have a folder full of images!
As you can see, we’re good, and as far as this glimpse tells me.. we did fine! Now its time to get on with these pictures.. but that’s a topic for another blog.. Thanks for reading!
Today we’re removing certificate pinning from Pokemon Go to man-in-the-middle the connection between my phone and the server, which is now required.
Main difference from similar posts, such as Eaton’s method where he removes it from the native code, is that, we’re not stepping to the dark side, and the main reason for that, for me, its much easier to patch the applications Dalvik code than the native ARM code, and I don’t feel too comfortable poking around in the native code, also I don’t have the tool required, Ida Pro with ARM..
Anyway! Lets get to the real deal, right!
First step, we need to take apart the APK, which is simple! Just use your favourite APK Extractor from Google Play, dump the APK on your machine and use APK Tools to unpack it.
java -jar apktool_2.1.1.jar d pokemon_original.apk -o pokemon
Where apktool_2.1.1.jar is your flavour of APK tool and pokemon_original.apk is the APK dumped from your device.
After that we have a folder containing all the files, good to modify!
Logically we make our way through niantic packages, com/nianticlabs/nia/network sounds good, right?
In this package we find a NianticTrustManager.smali, so its time to fire up your favorite text editor, you can use any, but please don’t use Notepad, its pain in the ass to read..
Given the name too, its clear that this Class implements X509TrustManager, which is as the name says, responsible for the trust management. So its time to lose the trust, right?
This creates a pokemon_ua.apk file. ua stands for Un-Aligned, if you’re into Android Dev, you might now that the apks needs to be aligned before shipping! Which is a matter of running a zipalign on them, which is also described in the manual signing process article.
And finally we got the final ‘release’ build! Lets shove that into our device! Make sure you uninstall previous installations of the app!
adb install pokemon_release.apk
Run the app on the device, throw in your age, sign in aaand… In like a flynn!
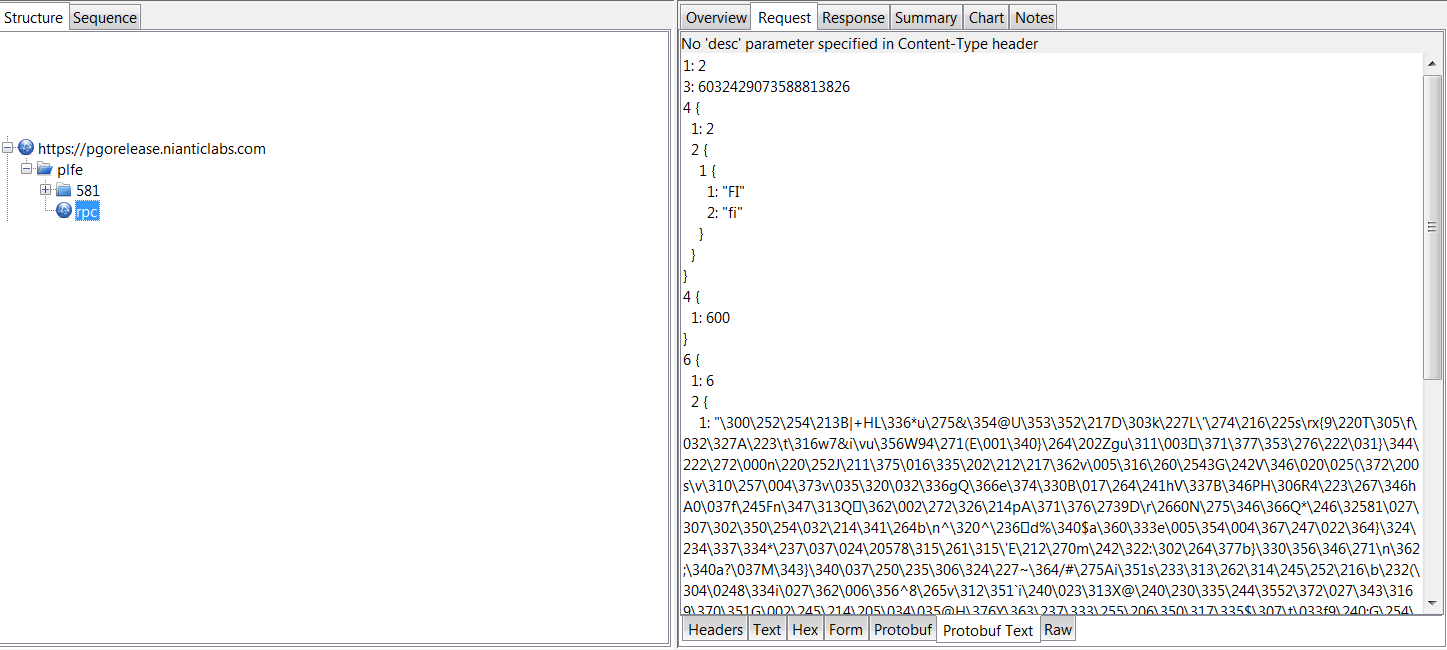
Open up your favorite MITM proxy, such as Charles, which is what I am going to use, and configure your device to connect to the proxy instead, continue using the app and you will see what will make angels hum.
There we go, unencrypted version of the packets! However this is in a undecoded protocol buffer, which descriptor you can probably find online.. In Github or somewhere..!
Hello guys, long time no crocodile, or how did it go, huh? Meaning, haven’t written here for too long.. Enough excuses!
Recently I was facing a problem, regarding taking a screenshot in Android programmatically, without falling back on unsupported API’s meaning, using the MediaProjection API’s introduced in API level 21, however, the actual problem I had, following their official examples or those of third party ones is a subject for another blog post!
Today we are covering, yet again, reverse engineering of a proven working application, this time, not for abuse of virtual benefits, but to copy a working functionality from a third party app, not in line by line manner, but in a overall concept, to avoid any copyright related takedowns.
IANAL but not that these kind of small companies have any power to pursue such or take down every app that uses similar technology to compare the code, but you can never be too sure or secure, or have too much moral to secure nightsleep.
Fun fact, the app I broke down seems to actually have a class leeched from rival application.
I wouldn’t have noticed, if they hadn’t kept the exact same package name as the rival application is released under.. Smart..
Initial steps I took to figure what I was doing wrong with the MediaProjection, to only receive the black screen, was ofcourse to find one application that does screencapture from service or such, that’s available in Google Play currently, and there’s plenty, not to name any, not that I am going to release a screenshotting application for now..
When I first found one I obviously put it through my favorite set of Android reverse engineering tools, which of easiest and quickest is bytecode viewer, big shootout for them, the UX is crap, but its for me, the easiest way to drop an APK in and receive both bytecode and human readable version of the code inside, and not even talking about the search tools, which are hard to use, but useful!
To my disappointment after finally finding the reference to the API I knew the app was using, due to the Android’s forced dialogue of giving app permission of capturing the screen, the decompiler were unable to reverse the bytecode due to the complicated branching or whatever.
After that I looked at the bytecode, that spanned across maybe 200 lines and ran it through in my head, couldn’t initially figure the difference between it and my rough implementation that I had partially scrapped from the API example, but for one, there was 500 ms sleep in added in the code, I tried adding it between same API calls, but no luck.. We had to go deeper!
Before digging deeper and spending all my time just to find out I am looking at wrong piece of code, as the application had what, 20 ways of capturing a screenshot, to support some legacy phones that I wasn’t looking to support, I copied baldly the .smali files, containing the dalvik code, to my own project, after ‘baksmaling’ it using apktool, and added a quick call to the function, which worked flawlessy and resulted in good looking screenshot, I was ready to proceed with the reverse engineering efforts!
I tried another decompiler or two, with no luck, hard to tell what it is, that breaks the decompiler, and I am not too much into those anyway, I started writing the code by hand, following the Dalvik code on my other screen.
If you’re not a robot or a machine in any other way, it will be pretty hard to go through so many lines of bytecode and getting the grasp of what’s happening without spending countless of hours on it.
I found its much easier to implement the logic in other language or even in pseudo code, for the ease of my brains, which has the most working paths of understanding Java, I did it in java, which is good, as it is the final language I am going the feature to implement in, even tough, implementing all the branches which are implemented in dalvik using labels, gotos and conditionals might get pretty tedious, after having it all written down, it will be easy to refactor it for real world use!
This isn’t too complicated, but if you have to stitch tens of this size patches of code in your mind, it gets pretty hard..
A quick rundown of above code in pseudo code for comparison
takeScreenShot(a, b, c, d)
 log("screenshot", b + " " + c + " " + d)
This is not(IIRC) not part of the applications code, but part of the code I used to find out which parameters the reverse engineered app passes to the function
As you can see, a small piece of java goodness turns into crazy amount of bytecode, and without even including the conditionals with all the labels, don’t even let me get into that part!
Round of applause for the findings
TL/DR
When reverse engineering bytecode your decompiler or other tool can’t handle, and its too overwhelming, just write it down in pseudo code or in your favorite language to give your brains a break!
I am working on an application that needs to display certain amount of items in a a scrollable view that have headers on top of every one of them, so as the title says, RecyclerView.
However, my data that is coming from SQLite backed database didn’t fit too well on the mould of just using different kind of view types, because the data was coming from SQLite on demand and if I were to use view types to support headers I would have to process the whole database before showing it and add some kind of layer that provides me with the headers.
But first I needed to make my own SpanSizeLookUp implementation to separate different sections of the grid.
Sectioned SpanSizeLookUp sketch
So the basic idea is that last item of each section is given with a span that makes it fill the rest of the row, so that the next sections items are dropped to the next row.
First I needed the information of which item belongs to which section, which I made my StickyGridHeadersAdapter in similar fashion as in timeshops implementation.
So the primary function of the adapter is to provide the header id for each position and its corresponding view.
So now that I got the information I am ready to extend the SpanSizeLookUp!
SpanSizeLookUp has one important function of determining each items span size, which is done by implementing getSpanSize method that takes the position of them item as parameter.
My implementation of getSpanSize first determines whether the item in question is the last item before next header, and if so, it calculates the remaining amount of columns in that row, that it needs to fill in order to bump the following item to next row.
So first we implement the last item before next header check, which is quite simple, take current and next item, and if their ids are different, they belong to different categories, meaning that the item in question is actually the last item before next header! Pretty simple huh?
    /**
     * checks if item is last before next header
     * <p/>
     * aka if next items id is different than current
     *
     * @param itemPosition
     * @return
     */
    private boolean isLastBeforeNextHeader(int itemPosition) {
        //header id of item in question
        long headerId = adapter.getHeaderId(itemPosition);

        //next header id, -1 if out of bounds, aka the rest of the row must be filled!
        long nextHeaderId = -1;

        //next item position, aka next item in question
        int nextItemPosition = itemPosition + 1;

        //checking if is within the bounds of the adapter
        if (nextItemPosition >= 0 && nextItemPosition < adapter.getItemCount()) {
            nextHeaderId = adapter.getHeaderId(nextItemPosition);
        }

        //checking if the ids different
        return headerId != nextHeaderId;
    }
Then we need to implement the actual span size lookup, it needs a little bit more logic!
    @Override
    public int getSpanSize(int position) {
        if (isLastBeforeNextHeader(position)) {

            //gets the number of items before this particular position in range of 0..spancount - 1
            int categoryOffset = getNumberOfItemsBeforePositionInCategory(position);

            //gets column index in range of 0..spancount - 1
            int columnIndex = (categoryOffset % spanCount);

            //gets number of extra columns in range of 0..spancount - 1
            int extraColumns = spanCount - (columnIndex + 1);

            return 1 + extraColumns;
        } else {
            //is just any ordinary item, takes one column width..
            return 1;
        }
    }
So first we use our lastly implemented method and check if it actually is the last item within the section, and if not, just return one.
But if the case is different, aka if it is the last item, we first calculate the offset of this item in question within the section, which is needed to calculate the remaining columns within the row, but for that we need to implement a way to calculate those preceding items.
Fortunately for us, its quite simple chore, given the fact that we can query the header id of each item, so basically what we do is we loop through each item preceding the current item til we find a change in header id!
    private int getNumberOfItemsBeforePositionInCategory(int position) {
        long categoryId = adapter.getHeaderId(position);

        for(int i = 1; i < position; i++) {
            if(adapter.getHeaderId(position - i) != categoryId) {
                return i - 1;
            }
        }

        return position;
    }
And to account for the case that this happens to be within the first category, we just return the given position, as it is the offset to the start of the list.
So with that info we can now calculate the column index..
//gets column index in range of 0..spancount - 1
int columnIndex = (categoryOffset % spanCount);
which is just taking modulus of the offset within category and the span count
and to get the amount of items there are left on this row after the particular item, we just substract the column index + 1 from the span count, accounting for the the range of 0.. span count – 1 of the columnIndex instead of 1 – span count
//gets number of extra columns in range of 0..spancount - 1
int extraColumns = spanCount - (columnIndex + 1);
so then we can just return the amount of columns that this is supposed to fill, meaning one plus the amount of extra columns
return 1 + extraColumns;
So now if we run the code, what we can see, is that each category is withing its own boundaries, cool!
This may not be obvious from the preview above, but if you look closely the last item within each section(read: color) is spanning to fill the rest of the row.
Now we only need to add the headers for each section, let the fun begin!
So we need to implement RecyclerView.ItemDecoration, which has two important methods, onDrawOver to draw over the RecyclerView, which handles the drawing of the header view, and getItemOffsets, which provides the offsets to the views, giving enough space for the header in this case, but the possibilities are limitless!
So first lets give enough space for the headers by implementing getItemOffsets!
This method in my case only checks if the item is under header, and if so, gives it top padding from the header height
To determine if item is under header we use isUnderHeader method which is implemented as follows:
    private boolean isUnderHeader(int itemPosition) {
        return isUnderHeader(itemPosition, spanCount);
    }

    /**
     * checks if item is "under header"
     * <p/>
     * Items is under header if any of the following conditions are true:
     * <p/>
     * a) within spanCount the header id has changed once
     *
     * @param itemPosition
     * @return
     */
    private boolean isUnderHeader(int itemPosition, int spanCount) {
        if (itemPosition == 0) {
            return true;
        }

        //get current items header id
        long headerId = adapter.getHeaderId(itemPosition);

        //loop through each item within spancount
        for (int i = 1; i < spanCount + 1; i++) {
            long previousHeaderId = -1;

            int previousItemPosition = itemPosition - i;

            //gets previous items headerId
            if (previousItemPosition >= 0 && previousItemPosition < adapter.getItemCount()) {
                previousHeaderId = adapter.getHeaderId(previousItemPosition);
            }

            //checks if header id at given position is different from previous header id and if so, returns true to indicate this item belongs under the header
            if (headerId != previousHeaderId) {
                return true;
            }
        }

        return false;
    }
We just loop the range of span count and check if there’s any item that has different header id than the given position, and if so, we know that this item belongs under header and needs to be given space!
now we can implement the drawing of the header, this function is a bit more exotic to handle the stickiness of headers, meaning moving the topmost header upwards when it is pushed by the following header.
    @Override
    public void onDrawOver(Canvas c, RecyclerView parent, RecyclerView.State state) {
        super.onDrawOver(c, parent, state);

        final int childCount = parent.getChildCount();

        //checks if there's any childs, aka can we even have any header?
        if (childCount <= 0 || adapter.getItemCount() <= 0) {
            return;
        }

        //stores the "highest" seen top value of any header to perform the pusheroo of topmost header
        int highestTop = Integer.MAX_VALUE;

        //loops through childs in the recyclerview on reverse order to perform the pushing of uppermost header faster, because before it, there is the next headers top stored to highestTop
        for (int i = childCount - 1; i >= 0; i--) {
            View itemView = parent.getChildAt(i);

            //fetches the position within adapter
            int position = parent.getChildAdapterPosition(itemView);

            if (position == RecyclerView.NO_POSITION) {
                continue;
            }

            //only draw if is the first withing recyclerview, aka is the first view in whole tree or if the item in question is the first under its category(or header..)
            if (i == 0 || isFirstUnderHeader(position)) {
                //fetches the header from header provider, which is basically just call to adapters getHeader/bindHeader
                View header = headerProvider.getHeader(parent, position);

                //calculates the translations of the header within view, which is on top of the give item
                int translationX = parent.getLeft();
                int translationY = Math.max(itemView.getTop() - header.getHeight(), 0);

                tempRect.set(translationX, translationY, translationX + header.getWidth(),
                        translationY + header.getHeight());

                //moves the header so it is pushed by the following header upwards
                if(tempRect.bottom > highestTop) {
                    tempRect.offset(0, highestTop - tempRect.bottom);
                }

                //draws the actual header
                drawHeader(parent, c, header, tempRect);

                //stores top of the header to help with the pushing of topmost header
                highestTop = tempRect.top;
            }
        }
    }
so first we perform couple of sanity checks to avoid useless drawing, we check if there actually is any items within the RecyclerView and if not, we just return to avoid useless work
        final int childCount = parent.getChildCount();

        //checks if there's any childs, aka can we even have any header?
        if (childCount <= 0 || adapter.getItemCount() <= 0) {
            return;
        }
then we initialize the value to store the preceeding headers top value to perform the pusheroo of topmost header, as commented
//stores the "highest" seen top value of any header to perform the pusheroo of topmost header
int highestTop = Integer.MAX_VALUE;
then for each item in backward order we do the following:
check if header should be drawn, by checking if is first item, which always should show header, making the sticky header effect, or if is first under any header
if (i == 0 || isFirstUnderHeader(position)) {
and the checking if the item is last header is quite simple, we just check if the preceding item has different header than current
and the item is first in the whole RecyclerView or first within its category, we now know that we can draw the header for this particular item, so we do that!
first we get the header item
//fetches the header from header provider, which is basically just call to adapters getHeader/bindHeader
View header = headerProvider.getHeader(parent, position);
which works in similar fashion as in timeshops implementation, we just call adapters get/bind header methods to obtain the header bound for this header id
then we just calculate the translations for this header, to draw it on top of the item in question
//calculates the translations of the header within view, which is on top of the give item
int translationX = parent.getLeft();
int translationY = Math.max(itemView.getTop() - header.getHeight(), 0);
then we set these values for a rect to pass them around and to more easily apply moving when translation topmost header to give room for the next
Then we adjust the rect position if it is pushed by the following header, aka if the current headers bottom is smaller than highest top, meaning the previously processed headers top
//moves the header so it is pushed by the following header upwards
if(tempRect.bottom > highestTop) {
    tempRect.offset(0, highestTop - tempRect.bottom);
}
then we actually draw the header
//draws the actual header
drawHeader(parent, c, header, tempRect);
and what this method call does is just draws the view on the given canvas within the rect
    public void drawHeader(RecyclerView recyclerView, Canvas canvas, View header, Rect offset) {
        canvas.save();

        canvas.translate(offset.left, offset.top);

        header.draw(canvas);

        canvas.restore();
    }
and then just set the highestTop to current headers top
//stores top of the header to help with the pushing of topmost header
highestTop = tempRect.top;
and I think we’re about to be done here!
After a quick run we can see it works as expected!
However this is just a simple and quick implementation and we might be missing something here, but for my simple use case it works, and if I find out anything, I’ll update here!
Should of probably used thicker header on the preview but… meh!
Today I was implementing an autofilling login form for Android Application which had the following requirements:
When user logs in he can check “Remember credentials” box to make the application remember the previous credentials
When user would log in next time if he had saved single username before he would be straightly offered with the previously saved credentials
If the user had previously entered multiple credentials a drop down will be shown that will let the user decide which of the credentials to use
An obvious choice to perform this task is to use AutoCompleteTextView, but unfortunately it has couple of limitations, which I posted about before, when I created InstantAutoCompleteTextView.
InstantAutoCompleteTextView solved some of these problems, but after that I still had couple of them left to overcome, and most important of them, the AutoCompleteTextView wouldn’t offer auto completion if you haven’t inputted any characters, or that after filling field completely, it would still show the user as hint.
I was using ArrayAdapter as AutoCompleteTextViews username adapter, to list matching usernames, but ArrayAdapters filter uses start of each word for matching prefixes, but in my case, as I was matching for usernames, I would need to match whole username, so basically I had to extend the ArrayAdapter to perform this operation.
Unfortunately ArrayAdapter stores the objects that it has as private field, so my extending adapter wouldn’t have access to them, without reimplementing most of its logic, so what I did, was open the ArrayAdapters source and reimplement most of its business, and reimplement the Filter it provides.
How I changed the Filter is that instead of matching for each word, I matched the whole string, and if the inputted text was exact to the adapters object, it wouldn’t be included, as when user had an exact match, it wouldn’t be needed to be shown anymore.
    private class ExactArrayFilter extends Filter {


        @Override
        protected FilterResults performFiltering(CharSequence prefix) {
            FilterResults results = new FilterResults();

            if(originalObjects == null) {
                originalObjects = Collections.synchronizedList(objects);
            }

            if (prefix == null || prefix.length() == 0) {
                List<T> list = new ArrayList<>(originalObjects);

                results.values = list;
                results.count = list.size();
            } else {
                String prefixString = prefix.toString().toLowerCase();

                final List<T> values = Collections.synchronizedList(originalObjects);

                final int count = values.size();
                final ArrayList<T> newValues = new ArrayList<>();

                for (int i = 0; i < count; i++) {
                    final T value = values.get(i);
                    final String valueText = value.toString().toLowerCase();

                    // Match against the whole with prefix and disinclude exact matches
                    if (valueText.startsWith(prefixString) && !valueText.equals(prefixString)) {
                        newValues.add(value);
                    }
                }

                results.values = newValues;
                results.count = newValues.size();
            }

            return results;
        }

        @Override
        protected void publishResults(CharSequence constraint, FilterResults results) {
            objects = (List<T>) results.values;
            if (results.count > 0) {
                notifyDataSetChanged();
            } else {
                notifyDataSetInvalidated();
            }
        }
    }
Now I have my Filter that makes the popup disappear after matching input is typed into.
Then I just have to implement the piece of code that handles the password autofill, and how I did that, is I stored set of user credentials as plain text(very secure) in JSON string to preferences, and now I could just when the AutoCompleteTextViews value changes, look up if there’s a already saved password and use that.
So what that basically meant is to add an TextWatcher and on afterTextChanged perform this check and set a fake password on the password field and store the selected password, or “override password” on other field to be used on login, so the potentially blackhat user can’t use the number of characters in the password to gain access to the password more easily.
Also now that I knew if the password was “fake” and “overriden” I could add a TextWatcher and another afterTextChanged callback that would reset the password if override was present, to imitate usual autofill behaviour.
ALL THIS MATERIAL IS PROVIDED FOR STUDYING PURPOSES ONLY AND MAY NOT USED TO PERFORM ANYTHING ILLEGAL
Yesterday my friend told me about a certain Android application that had a voucher for one lunch place, so as software engineers, a question quickly popped up – how would one work around it, and reuse the voucher.
Its surely connecting to a API of some kind to fetch the details of available vouchers, and it must somehow mark the voucher used after the cashier presses the “Use” button.
So working around it should be simple, right? We could use a proxy and just filter the consume requests? That would require extensive amount of work to do inside the phone and possibly rooting.
What about changing the devices DNS or setting the proxy to external server which would do the processing for us? Unfortunately as it turns out after setting a simple proxy, as the application happens to use certificate pinning, which basically means that doing a Man In Middle Attach is slightly harder, we would need to first change the bound certificate withing the application and then make our proxy sign the requests with the certificate inside the application.
So the next thought as a hobbyist reverse engineer is to export the APK to PC, decompile it and patch the request so it is not actually never sent to the server, but the completion listener is fired and the application thinks that we have actually received a positive answer from the server.
So first I had to figure out how hard is it to patch applications? Exporting the APK is simple as downloading an app from Google Play and fetching it over adb to PC.
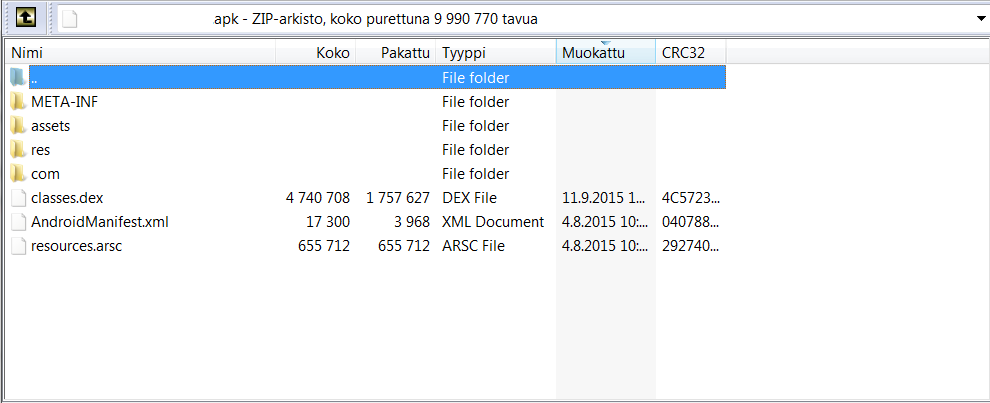
Working with the APK itself is slightly harder because the APKs have compiled the Java source to different format than usual Java classes, meaning the dex file.
There is a classes.dex file in the root of the .apk file after you open it with your favourite zip tool(WinRAR anyone?)
So we take the classes.dex out from the APK and go ahead and figure what can we do with it?
We need to use some kind of tool to turn this into class files to better work with it.
So as I have previously worked with dex files I knew there was a tool called dex2jar(I like the naming btw) that would let me convert the classes.dex file(or the whole apk) to a .jar package containing the classes, but I had never before repackaged the outcoming classes into classes.dex, so this would be something new.
So I downloaded the dex2jar from its github page and unpackaged the binaries and saw what tools I now had at my disposal.
d2j-dex2jar.bat
d2j-jar2dex.bat
which meant that possibly I could do the unpacking and repacking with just these tools, right?
So I transferred the classes.dex to the containing folder and fired couple of commands to turn the classes.dex into classes-dex2jar.jar which I could then work with
d2j-dex2jar.bat classes.dex
As it turns out after a minute, I had the .jar file within the same folder and was ready to get my hands dirty!
After unpackaging the jar I needed a tool I could work on the .class files with, I had recently bought DJ Java Decompiler but I thought I could try something new this time, as I have recently stumbled upon a Bytecode Viewer, and decided to give it a go!
The tool was supposed to have inline bytecode edition, but I couldn’t get it working, but I could find what I was looking for, the place where the HTTP request is made for the item to be consumed.
It have been a while since I have last time got my hands dirty with Java Bytecode or with decompiled code.
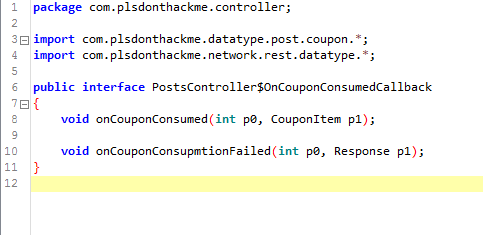
This piece of code is a anonymous class of anonymous class, which you can see from the naming of the class, Java adds postfix to class names that have been compiled from anonymous classes(classes within classes).
But from this code I can see that it is calling some method consumeCoupon, which after checking from its definition sends the HTTP request, and also it takes a OnCouponConsumedCallback as a parameter, so we know it is also passed here, even if its hard to judge from the decompiled source.
So what we can do now, is see what methods does this callback have and see if we can make this method call the completion callback straight, instead of going to the HTTP Server first, which ultimately means the coupon is never actually consumed in the server side.
The interface has two methods, but we only care about the other, onCouponConsumed, it takes a int, which possibly is the position within some list, or somekind of id, and a CouponItem.
The server request passes also a position along in the request, so we can try to plug that in and see what happens, unfortunately at this moment I have to change tool, because I am unable to edit the bytecode within this tool.
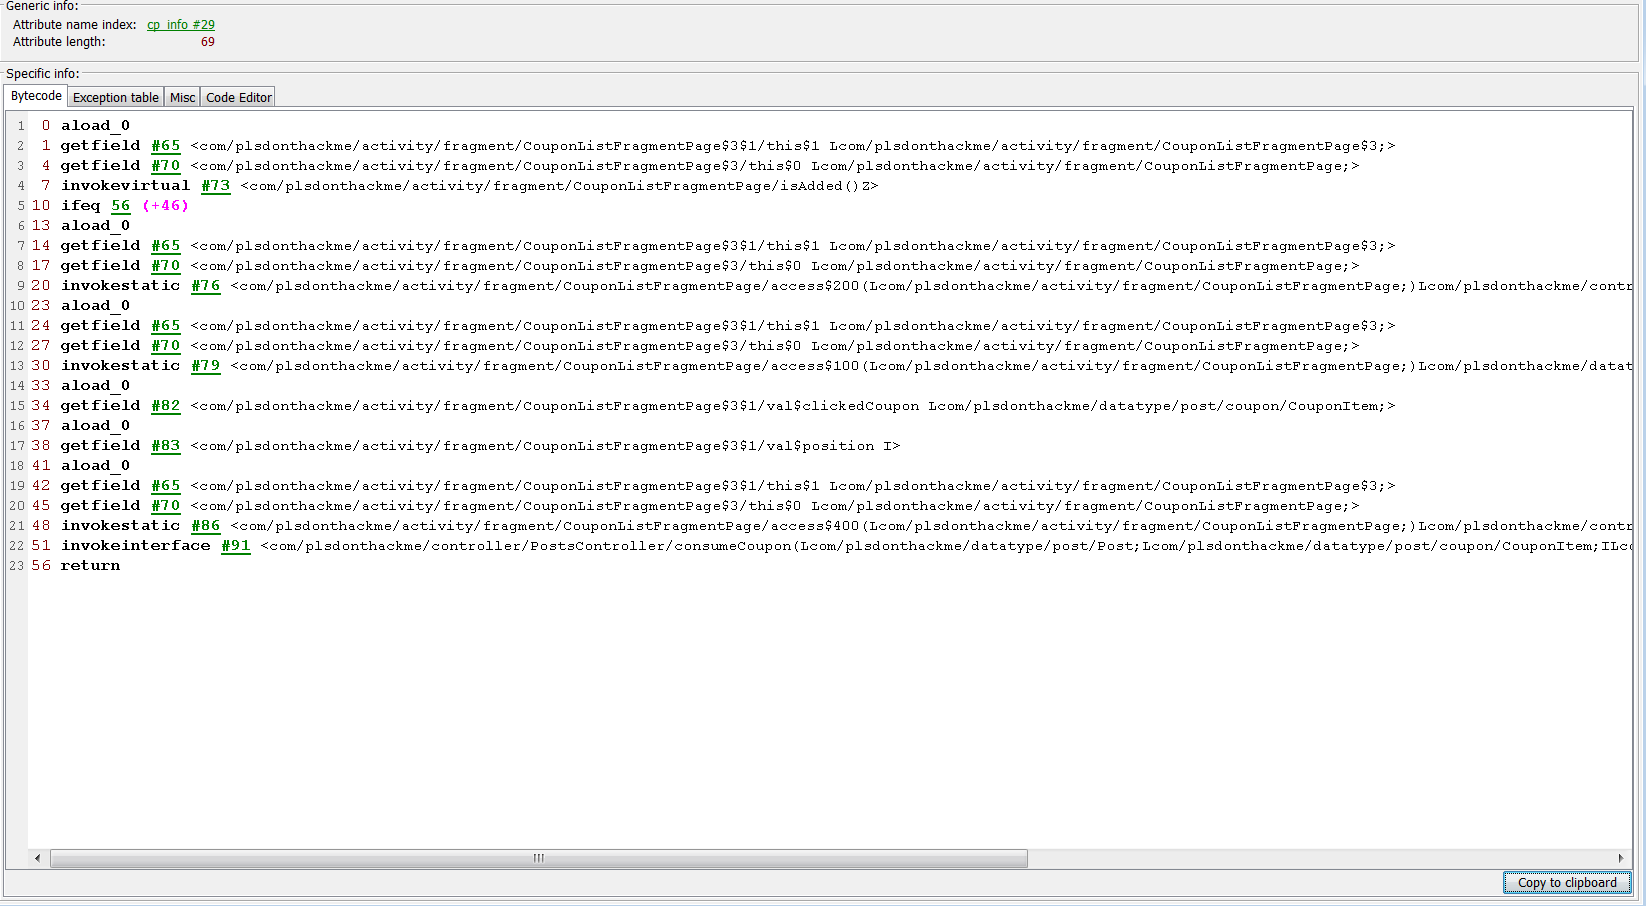
After looking at this beauty for a while I was ready to perform some patching
First of all I had to remind myself a little how the bytecode worked and in which order things had to be in order for this to work
So first I removed the isAdded check, because it is not needed, and I don’t even know what it checks for, which was matter of just trimming the code down a little
Then i started the real work, first I had to load the object into the stack, which I am calling the method on, so I had to figure out how is the OnCouponConsumedCallback added to the stack, which was relatively easy, I just tracked it down by the knowledge of the argument order.
I moved it to the top of the bytecode list, so it was first loaded on stack, as it is the object I am calling the method on.
Then I needed the parameters, the method I am calling is taking first the int and then the CouponItem as parameter, so I needed to figure out exactly how those were loaded to the older function call and move them after the loadage of listener.
Now I only need to call the method with the given pameters, so its time to stretch my fingers and check up the opcode names
Ultimately I ended up with the following code
And to check that the code is valid before getting it back to the apk and trying it on my device I first open the saved class file on the ByteCode Viewer
And boom! Its just like I expected
Now its time to get this goodness into the apk and actually be able to install it into the device! So first I added this class back to the .jar that the dex2jar outputted originally
Then I ran jar2dex on it
And there I had it, a shiny new classes.dex ready to be loaded into my precious devices memory!
So I moved the new classes.dex back to the apk, and now it was only matter of resigning the apk and installing it
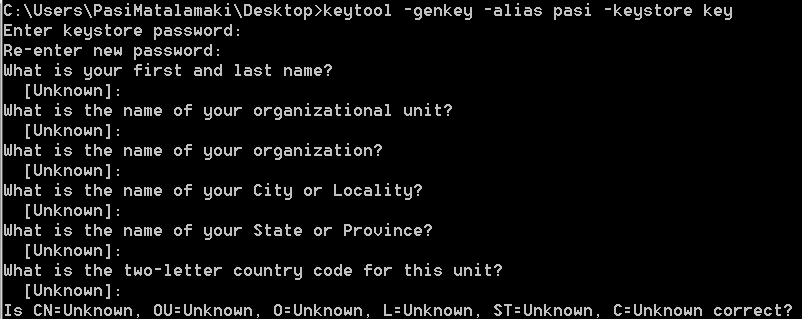
So I had to create a new keystore for this purpose, so I fired up keytool
And ran it with -genkey -alias pasi -keystore key arguments
and set unknown values to all the questions asked, and was ready to go!
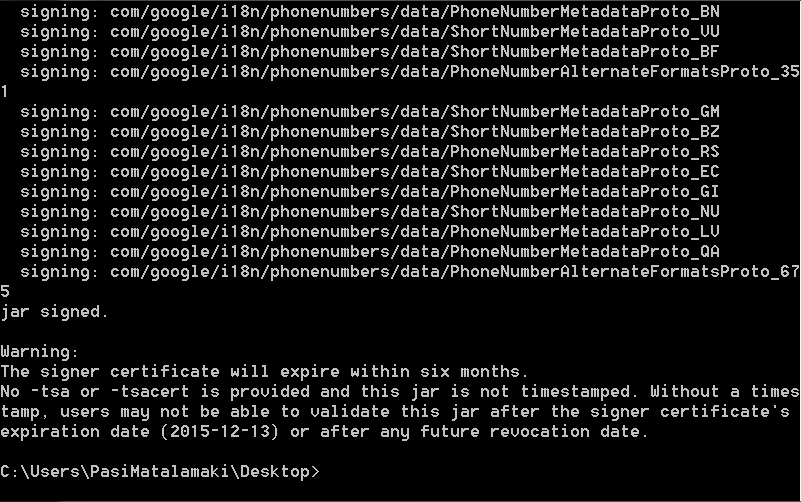
Now its time to sign the apk using jarsigner, so I ran the following command
C:\Users\PasiMatalamaki\Desktop>jarsigner -verbose -keystore key -signedjar “app_ua.apk” “app.apk” pasi -storepass helloworld
and that ultimately generates a signed versio of the “app.apk” apk file signed with keystore with name key(the one we just created) using the alias pasi and password helloworld
Now I have to align it using zipalign to make it work with android devices so I ran
zipalign -f 4 “app_ua.apk” “app_release.apk”
And ended up with app_release.apk that can now finally be installed on my phone and after a quick try, it worked like a charm!
Of course this is not to be used in real world, because that would be illegal, this is just proof of concept.
But thanks for reading and hit me up in comments if you’re interested in more of this kind of material.
Today I was stuck with yet another Android related problem, I was creating a edit text with auto completion that always shows the drop down to help the user remember the last choices.
So the ultimate requirement is to on activity open show list of all items in the auto completion adapter in a drop-down, which should be simple right?
The obvious choice is to use AutoCompleteTextView, which provides the feature of listing possible choices after inputting certain amount of characters, however I knew that it wouldn’t show the listing before inputting certain amount of characters.
First thing to do was of course to open the documentation which didn’t appear to contain any helpful information, however I threw together the activity with one of these view with a dummy adapter and tested how it works normally.
Normally it takes two matching characters to get the drop down to appear, and there is actually a option to set the threshold, so I decided to set it to 0 and checked what would happen if I focused the field
Judging from the documentation of setThreshold I know that if the threshold is set under one, the threshold is actually being set to minimum of one.
When threshold is less than or equals 0, a threshold of 1 is applied.
No luck.. You have to input at least one character to make the popup appear. I think its time to browse through the source..
First thing I noticed was that the AutoCompleteTextView has reference to the ListPopupWindow which is ultimately used to show the actual popup that lists the possible options
I looked for the conditions which needs to be fulfilled in order for the popup to be shown and found out that there is actually a flag on the ListPopupWindow, isDropDownAlwaysVisible, which also has a setter, setDropDownAlwaysVisible, so I was sure I was onto something!
Unfortunately the setDropDownAlwaysVisible setter had a @hide javadoc annotation, which removes the method from public with the following comment
So I decided to find out those conditions, but there was only single method call to this setter within AutoCompleteTextView which was just a delegate setter which too had a @hide javadoc annotation, but this time the comment declared that it was pending API council approval, which meant this was a dead end.
This basically meant that I needed to hook on the onFocusChanged by either subclassing or setting a listener and within that hook make the popup visible.
Luckily there was public showDropDown method within AutoCompleteTextView which meant that subclassing wouldn’t be necessary and this could be a matter of a simple View.OnFocusChangeListener, the day was saved!
Unfortunately it turns out that the onFocusChange may be called even if the window containing isn’t necessarily visible, so this is fixed with matter of checking the fact, right?
So I added a check if getWindowVisiblity of the view that the onFocusChange listener passes as parameter is visible, but as it turns out after orientation change the View.OnFocusChangeListener is triggered before the window is visible, okay.. we have a problem here..
I thought to myself, okay.. so if we add a callback to the view so I’ll know when the containing view is visible, right? Unfortunately the View doesn’t provide an API or a mechanism to do attach a callback to the onAttachedToWindow method, so I had to scrape that idea..
After swallowing my pride that this couldn’t be implemented using a listener, I decided to give it a try to subclass the AutoCompleteTextView and override nessaccary methods such as onFocusChanged and onAttachedToWindow
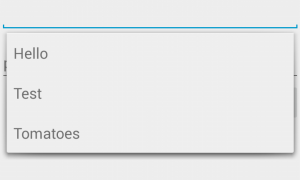
I also override enoughToFilter method to make sure that I could set minimum threshold to zero using a special flag of my new InstantAutoCompleteTextView
Below you can see the final result of the progress.
The final source code can be obtained as gist here
If you have better ideas of how the problem could be solved, feel free to comment below.
Hello dear readers, or should I say, Hello World? Hue hue!
This is third time if I am calculating correctly that I am starting a blog, so don’t expect too much.
I’ve always stopped writing due to lack or quality of content, but this time I am sure I have something quite interesting here!
I am currently in progress of writing a internal application for Android that is supposed to manage the calls in logging manner.
So the ultimate task I am trying to solve here is to log every call and mark their type to the database.
However today I was stuck with a problem!
So as a Android developer(?) you might know about the Broadcast system Android uses to notify applications about events system wide.
As I started to develop the application the obvious choice was of course to hook to the broadcast system using a BroadcastReceiver and listening for android.intent.action.PHONE_STATE and android.intent.action.NEW_OUTGOING_CALL broadcasts, which basically notifies the receiver about telephony state changes such as phone ringing or phone not ringing anymore.
As I started to implement the BroadcastReceiver and checking for possible outcomes I noticed on the documentation the following text:
The EXTRA_STATE extra indicates the new call state. If the new state is RINGING, a second extra EXTRA_INCOMING_NUMBER provides the incoming phone number as a String
That’s when I got worried, what if the system doesn’t provide me with the number in other states except for the RINGING state, how can I possibly know when which call had ended when the state is updated..
I began my quest to crawl through the docs thoroughly and quickly found out that the TelephonyManager has a listen method, which accepts a PhoneStateListener, which on part has a method onCallStateChanged with parameters of phoneState and incomingNumber, I thought this was it!
But after firing up the app and doing some calls my worst nightmare came to true, the incomingNumber is actually only incomingNumber, and what I mean is that it is only provided when a call is receiving, AKA ringing.. So using this listener I could only receive the same amount of data as with the broadcast receiver..
I was just about to give up handling multiple calls for the API limitations but as we visited chinese restauraunt on our lunch break we came up with a ‘foolproof’ way of handling multiple calls.
As we’re receiving the IDLE event as a broadcast when all the calls have ended, we know then to query the call log for any recent calls, and see which are new and how long had they lasted and let the user handle logging of those.
And that’s what I ended up with. When the BroadcastReceiver is first started, it checks if the processed call ids have been initialized, and if not it setups a list of phone calls that were pre-existent before the installation of the app, to figure out which of the calls are new.
Then the app just sits and waits for the EXTRA_STATE_IDLE to be broadcasted and once it is done it starts listening for changes in CallLog with a ContentObserver, and once the change happens we know that there’s been a write in the call log(hopefully..) and proceed to process the calls!
Phew! that was quite an adventure! but these are the kind I walk up to once in a while, and hope to write about.
So if you’re interested more about such horror stories as a Android Developer, drop me a comment.